Ever look at your closet and think, ‘I wish I had something like THIS?’ Well, you’re in luck. Learning how to make your own clothing isn’t as scary as it sounds. It’s about taking control of your style and creating pieces that actually fit and feel like you. We’re going to walk through the whole process, from getting ideas to sewing those final stitches. So grab your fabric, and let’s get started on making clothes that are totally yours.
Key Takeaways
- Start by finding inspiration for unique garment designs, whether from art, nature, or current trends, to guide your custom clothing projects.
- Learn to develop patterns, either by adapting existing ones or drafting from scratch, which is a core skill for how to make your own clothing.
- Master basic sewing techniques like straight stitches and backstitching, and prepare your fabric properly to ensure your custom garments are well-constructed.
- Transform existing clothes through refashioning and alterations to create personalized pieces and perfect the fit, reducing waste and saving money.
- Focus on sustainable fabric choices and zero-waste cutting methods to build a custom wardrobe that is both stylish and environmentally friendly.
Unlocking Your Style: Designing Your Own Clothing
Ever feel like the clothes you want just aren’t out there? That’s where making your own comes in. It’s about creating pieces that truly speak to who you are. This section is all about getting that creative ball rolling, from finding your spark to actually making a pattern.
Finding Inspiration for Unique Garments
Inspiration can pop up anywhere. Seriously, anywhere. It might be a cool texture on an old building, a color combo in a painting, or even the way a flower petal folds. Don’t just look at fashion magazines; look at the world around you. The most unique designs often come from unexpected places. Think about how you could translate that interesting weave you saw on a basket into an embroidery pattern for a simple top. Or maybe the silhouette of a vintage car inspires the cut of a jacket. Keep a little notebook or use your phone to jot down or snap pictures of things that catch your eye. It’s all fuel for your creative fire.
Developing Patterns from Scratch
Once you have an idea, you need a pattern. You can totally draft one yourself. It sounds intimidating, but it’s really just about translating your measurements and design ideas onto paper. You’ll need to learn how to measure your body accurately and then how to draw out the basic shapes – like the front and back of a bodice or a skirt panel. It gives you total control over the fit and style. It’s a bit like being an architect for your clothes.
Here’s a basic idea of what goes into pattern drafting:
- Measurements: Get accurate body measurements (bust, waist, hips, etc.).
- Drafting: Use these measurements to draw the basic pattern shapes on paper, adding room for movement (this is called ease).
- Muslin/Toile: Make a test version out of cheap fabric to check the fit before cutting into your good material.
Adapting Existing Patterns for Customization
If drafting from scratch feels like too much right now, that’s totally fine. You can take a commercial pattern – the kind you buy at the fabric store – and make it your own. It’s like a starting point. Maybe you love the shape of a dress pattern but want a different neckline. Or you want to add pockets to a skirt pattern that doesn’t have them. You can also combine elements from different patterns. This is a great way to get custom-looking clothes without starting from zero. You can find lots of resources on how to modify sewing patterns to fit your vision.
Sometimes, the simplest change to an existing pattern, like altering a sleeve length or changing a collar style, can make a garment feel completely new and perfectly suited to your personal taste. It’s about making small adjustments that have a big impact on the final look and feel.
Bringing Your Vision to Life: Essential Construction Techniques
Preparing Your Fabric for Success
Before you even think about threading a needle, you’ve got to get your fabric ready. This step is super important, and honestly, a lot of people skip it, which leads to problems later. First up, pre-washing. Think of it like giving your fabric a trial run in the washing machine. Natural fibers, especially cotton and linen, are notorious for shrinking. Washing them before you cut and sew means any shrinking happens now, not after you’ve spent hours making a garment that suddenly doesn’t fit. It also helps get rid of any excess dye that might bleed onto other clothes.
Next, ironing. A good press with a hot iron and maybe some steam makes a world of difference. Wrinkles can throw off your measurements and make your cuts uneven. Smooth fabric means accurate cutting and sewing, which makes the whole process way less frustrating. It’s these little things that make your finished piece look neat and tidy.
Mastering Foundational Sewing Stitches
Okay, fabric prepped and ironed? Great. Now we get to the actual sewing. You don’t need a million fancy stitches to make cool clothes. A few basics will get you pretty far. The straight stitch is your best friend. It’s what you’ll use for most seams. Make sure your machine is set up right – tension, stitch length, all that jazz. A good straight stitch looks clean and holds strong.
Then there’s the zigzag stitch. This one is handy for a few things. It’s great for finishing raw edges so they don’t fray like crazy. If you’re working with stretchy fabric, like knits, a zigzag stitch allows the seam to stretch with the fabric instead of popping open. You can also use it for decorative purposes, like adding a fun border.
Don’t forget the backstitch. This is basically sewing backward for a few stitches at the beginning and end of a seam. It locks the stitches in place so your seams don’t unravel when you wear or wash the garment. It sounds simple, but it’s a game-changer for durability.
Here are some common stitches and their uses:
- Straight Stitch: For seams, topstitching, and general construction.
- Zigzag Stitch: For finishing raw edges, sewing knits, and decorative accents.
- Backstitch: To secure seams at the start and end.
- Gathering Stitch: Used to create fullness, often seen in skirts or sleeves.
Paying attention to how you sew each seam, even the ones on the inside that no one sees, really makes a difference in how professional your finished garment looks and how well it holds up over time. It’s about building a solid foundation for your clothing.
Adding Professional Finishing Touches
This is where your homemade garment goes from looking just okay to looking really polished. It’s all about the details that make a piece look like it came from a boutique, not a beginner’s sewing class. One big one is pressing your seams as you go. After you sew a seam, open it up and press it flat with your iron. This makes the seams lie smoothly and prevents them from looking bulky. It takes extra time, but the result is worth it.
Think about clipping curves and corners. When you sew a curved seam, you need to snip little notches into the seam allowance (the fabric part outside the stitch line) so the curve can lie flat when turned right side out. For sharp corners, you trim the fabric away so they don’t look rounded and messy. These small actions allow the fabric to behave properly and create clean lines.
Finally, consider topstitching. This is stitching that you see on the outside of the garment, usually close to a seam. It not only looks good, adding a crisp line, but it also helps the seam allowance lie flat on the inside and adds extra strength. You can use a matching thread for a subtle look or a contrasting color for a bolder statement. These finishing touches really show you care about your work.
Transforming Existing Wardrobe Pieces
Sometimes, the most exciting fashion finds aren’t in a store, but right in your own closet or tucked away in a thrift shop bin. Giving old clothes a new life is a fantastic way to build a unique wardrobe without always buying new. It’s about seeing the potential in what you already have and giving it a fresh start.
Reimagining Old Clothes into New Styles
This is where creativity really shines. Think about taking a pair of jeans that don’t fit quite right anymore and turning them into a stylish denim skirt. Or maybe that oversized button-down shirt from your partner’s closet can be transformed into a chic, fitted blouse for you. It’s all about refashioning – altering the shape and style of a garment to make it something completely new and personal. You can even combine pieces, like sewing the top of one dress onto the skirt of another, to create a truly one-of-a-kind item.
- Consider the fabric: Is it sturdy enough for a skirt? Does it drape well for a new top?
- Look at the silhouette: Can you cut it differently? Can you add or remove sleeves?
- Think about the details: Buttons, zippers, and pockets can often be reused or repurposed.
Perfecting Fit Through Practical Alterations
Even if you don’t want to change a garment’s style drastically, a few simple alterations can make a world of difference. Getting the fit just right is key to loving what you wear. Maybe a dress is a bit too loose around the waist, or a pair of trousers needs hemming. These aren’t complicated sewing projects, but they can completely change how a piece looks and feels on you. Learning to adjust seams, take in waistbands, or shorten hems means you can wear those clothes you already own with confidence.
Here’s a quick look at common alterations:
| Garment Type | Common Issue | Solution |
|---|---|---|
| Pants/Skirts | Too long | Hemming |
| Dresses/Tops | Too loose | Taking in side seams |
| Shirts | Sleeves too long | Shortening sleeves |
Adding Creative Embellishments for Personalization
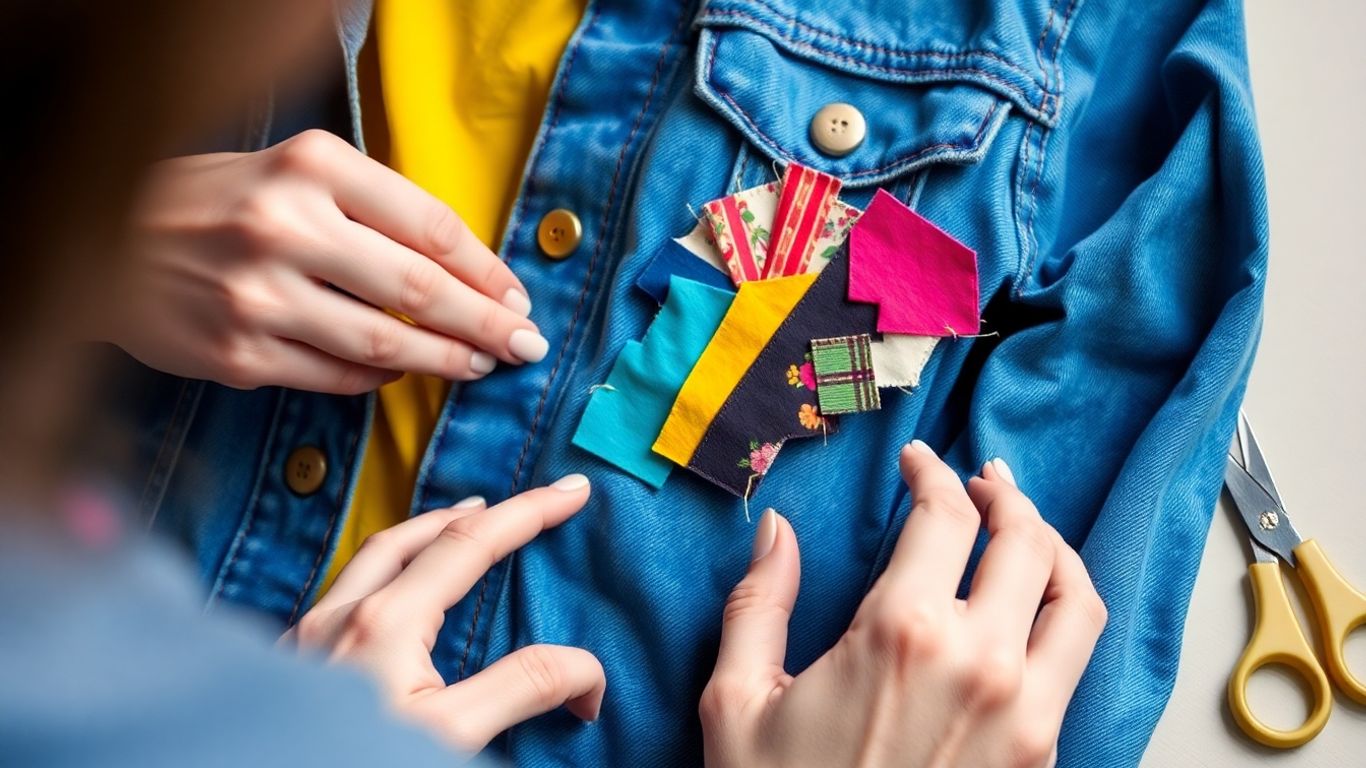
Once you’ve got the fit sorted and maybe even changed the style, you can really make a piece your own with embellishments. This is where you add those special touches that scream ‘you’. Think about sewing on patches from places you’ve traveled, adding some colorful embroidery to a plain t-shirt, or attaching beads and sequins to a jacket for a bit of sparkle. Even simple things like changing out the buttons can give a garment a whole new personality. It’s a great way to add visual interest and make something that looks store-bought feel truly custom.
Don’t underestimate the power of small details. A well-placed appliqué or a unique trim can turn a basic item into a standout piece. It’s about adding your personal flair and making your clothes tell your story.
Advanced Garment Modifications
Sometimes, a simple alteration just won’t cut it. You might have a piece of clothing that you love, but it just doesn’t serve its purpose anymore, or maybe you want to combine two items into something entirely new. This is where advanced garment modifications come in. We’re talking about making bigger changes, like turning a long dress into a stylish top or even repurposing fabric from one garment to create a completely different item, like a tote bag from an old t-shirt. It takes a bit more skill and planning, but the results can be incredibly rewarding.
Structural Changes for a New Purpose
This is where you really get to play with the form of a garment. Think about taking a pair of jeans and transforming them into a skirt, or maybe cutting down an oversized jacket to create a more fitted silhouette. It could also mean combining two separate pieces of clothing into one cohesive item. For example, you could take the sleeves from one shirt and attach them to another, or even merge two different tops to create a unique color-blocked effect. These kinds of changes require a good understanding of how garments are put together.
Identifying Potential in Pre-Owned Garments
Before you start cutting and sewing, it’s smart to look at what you have with fresh eyes. Not every piece of clothing is a good candidate for a major makeover. Look for items made from good quality fabric that are still in decent shape. Simple designs with classic shapes are often the easiest to work with. You might find a gem in your own closet or at a thrift store that just needs a little bit of creative intervention to become something amazing. It’s like a treasure hunt for your wardrobe!
Building a Cohesive Custom Wardrobe
Once you get comfortable with modifying individual pieces, you can start thinking about your wardrobe as a whole. Instead of just making random items, try to build a collection of clothes that work well together. This means choosing pieces that fit your style, fit your body perfectly, and maybe even share a similar color palette or fabric type. It’s about creating a personal style that feels authentic and intentional, rather than just buying whatever is trendy. A well-planned custom wardrobe can make getting dressed in the morning so much easier and more enjoyable.
Building a custom wardrobe isn’t just about making clothes; it’s about creating a collection that truly represents you. It’s a way to express your individuality and make more thoughtful choices about what you wear. This approach can lead to a more sustainable and satisfying relationship with fashion.
Sustainable Choices in Custom Clothing
Making your own clothes is a fantastic way to build a wardrobe that’s both stylish and kind to the planet. It’s not just about looking good; it’s about feeling good knowing you’re making more thoughtful choices. When we talk about custom clothing, sustainability is a big part of the picture. It means thinking about where our materials come from and how our creations impact the environment.
Selecting Eco-Friendly Fabrics
Choosing the right fabric is the first step toward a greener wardrobe. Forget those synthetic materials that shed microplastics; let’s look at better options. Think natural fibers and recycled materials.
Here are some great choices:
- Organic Cotton: Grown without harmful pesticides, it’s better for the soil and the farmers.
- Linen: Made from flax, it’s durable, breathable, and requires less water to grow than cotton.
- Tencel™ (Lyocell): This fabric comes from wood pulp, often sourced from sustainably managed forests, and is produced in a closed-loop system that recycles water and solvents.
- Recycled Fabrics: Look for materials made from post-consumer waste, like recycled polyester or cotton. This gives old materials a new life.
When you’re shopping for fabric, check the labels. Many fabric stores now highlight sustainable options, and there are plenty of online retailers specializing in eco-friendly textiles.
Designing for Versatility and Longevity
Part of being sustainable is making clothes that you’ll actually wear for a long time. This means designing pieces that can be used in many different ways. Instead of making a trendy, one-off item, aim for garments that can be mixed and matched with other things in your closet. A classic shirt or a well-fitting pair of trousers, for example, can be dressed up or down. This approach means you need fewer items overall, which is great for your wallet and the planet.
Creating a cohesive wardrobe where pieces work together reduces the urge to constantly buy new things. It’s about quality over quantity, making sure each item serves a purpose and brings you joy for years to come.
Implementing Zero-Waste Cutting Methods
Have you ever noticed how much fabric gets left over after cutting out pattern pieces? Those scraps can add up. Zero-waste cutting is a technique where you arrange your pattern pieces on the fabric in a way that uses almost every bit of it. It takes a little more planning upfront, but it significantly cuts down on textile waste. You can find patterns specifically designed for zero-waste cutting, or you can experiment with arranging your existing patterns more efficiently. Sometimes, those leftover scraps can even be used for smaller projects like patches or accessories, so nothing goes to waste.
Here’s a quick look at the benefits:
- Reduces textile waste going to landfills.
- Saves money by using fabric more efficiently.
- Encourages creative problem-solving in pattern layout.
- Contributes to a more environmentally responsible sewing practice.
Achieving a Flawless Fit

Getting clothes to fit just right can feel like a puzzle, right? Especially when you’re making them yourself. It’s not just about grabbing a size off the rack; it’s about making something that actually feels good on your body. This section is all about making sure your handmade clothes look and feel amazing, like they were made by a pro, just for you.
Taking Accurate Body Measurements
This is where it all starts. You can’t get a good fit if you don’t know your actual measurements. Forget what you think you know about your size; grab a soft measuring tape and let’s get real. It’s best to have someone help you, or at least stand in front of a mirror to check your posture.
Here are the key spots to measure:
- Bust: Measure around the fullest part of your chest, keeping the tape level.
- Waist: Find your natural waistline, usually the narrowest part of your torso, and measure around it.
- Hips: Measure around the fullest part of your hips and rear.
- Inseam: Measure from your crotch down to where you want your pants to end.
- Arm Length: Measure from your shoulder bone down to your wrist bone.
It’s super important to write these numbers down and keep them handy. They’re your blueprint for a great fit.
Understanding Pattern Ease and Adjustments
Patterns have something called ‘ease.’ This isn’t a mistake; it’s extra room built into the pattern for comfort and movement. Think about it: you need to be able to sit down, reach for things, and just generally live in your clothes! Too little ease, and your garment will feel tight and restrictive. Too much, and it’ll look baggy and shapeless.
- Wearing Ease: This is the extra room for everyday movement. A t-shirt needs more wearing ease than a fitted blouse.
- Design Ease: This is the extra room added for a specific style, like a flowing skirt or a relaxed-fit jacket.
When you’re looking at a pattern, it usually tells you how much ease is included. You’ll also need to know how to adjust the pattern if your measurements don’t match the standard sizes. This might mean adding or subtracting inches from the pattern pieces, especially at the bust, waist, and hip lines. It sounds complicated, but it’s really just about making the pattern match your body.
Refining Fit with Small Tweaks
Even with accurate measurements and a good pattern, you might still need to make little adjustments. This is where the magic happens, turning a decent garment into a fantastic one.
Sometimes, the best way to check the fit is to do a ‘muslin’ or ‘toile’ – a practice version of your garment made from cheap fabric. You can then try it on and see exactly where it needs tweaking before you cut into your good fabric. It saves a lot of headaches later on!
Common tweaks include:
- Taking in side seams: If a garment is too wide, you can carefully take it in along the side seams.
- Adjusting shoulder seams: If the shoulder seam is too long or too short, it can make the whole garment hang strangely. Small adjustments here make a big difference.
- Lengthening or shortening: This is common for sleeves and pant legs, but also for the torso of dresses and tops.
Don’t be afraid to pin, unpick, and repin. It’s all part of the process. The goal is a garment that feels like a second skin, comfortable and flattering, making you feel great every time you wear it.
Essential Tools for Your Sewing Journey
Alright, let’s talk tools. You can’t build a house without a hammer, and you can’t make cool clothes without the right gear. Don’t worry, though, you don’t need a whole workshop to start. We’ll break down what you really need to get going and what can wait until you’re feeling more adventurous.
Must-Have Basic Sewing Equipment
These are the absolute basics. If you have these, you’re pretty much set to start stitching. Think of them as your sewing starter pack.
- Sewing Machine: This is your main workhorse. You don’t need the fanciest model out there, but one that can do a straight stitch and a zigzag stitch is a good start. Look for something reliable that feels sturdy. Brother and Singer both make decent entry-level machines.
- Fabric Scissors: Seriously, get scissors just for fabric. Using them on paper dulls them super fast, and you need sharp blades for clean cuts. Trust me, it makes a huge difference.
- Measuring Tape: You need to measure accurately, right? Get a flexible tape measure that doesn’t stretch out. The kind used for tailoring is perfect.
- Pins and Needles: You’ll need a good handful of pins to hold your fabric pieces together while you sew. And a variety pack of hand-sewing needles is handy for small repairs or specific stitches.
- Seam Ripper: Mistakes happen. It’s okay! A seam ripper is your best friend for carefully taking out stitches without wrecking your fabric. It’s a lifesaver.
Specialty Tools for Custom Projects
Once you’ve got the hang of the basics and maybe made a few things, you might want to add some tools that make specific tasks easier or give your projects a more professional look. These aren’t strictly necessary at first, but they’re really helpful.
- Rotary Cutter and Mat: These are fantastic for cutting fabric quickly and precisely, especially if you’re working with multiple layers or tricky patterns. The mat protects your surfaces.
- Dress Form: If you’re serious about fit, a dress form is amazing. You can drape fabric on it to see how it hangs and make adjustments before you even sew a seam.
- Tailor’s Chalk or Fabric Pen: For marking lines and adjustments directly onto your fabric. Make sure it’s something that washes out easily!
- Good Iron and Ironing Board: Pressing your seams as you go is a game-changer for a neat finish. A decent iron makes this much less of a chore.
Maintaining Your Sewing Tools
Taking care of your tools means they’ll last longer and work better. It’s not complicated, just a few simple habits.
- Clean Your Machine: Dust and lint build up inside your sewing machine. Give it a quick clean regularly according to your machine’s manual. It prevents snags and keeps it running smoothly.
- Sharpen Scissors: Keep those fabric scissors sharp. There are special sharpeners for fabric shears, or you can take them to a professional.
- Store Properly: Keep your pins and needles in their containers so you don’t lose them or prick yourself. Store your rotary cutter with the blade safely retracted.
Taking care of your sewing tools is like taking care of any other equipment you rely on. A little bit of attention goes a long way in making sure they perform well and don’t cause you unnecessary headaches when you’re in the middle of a project. It’s about making your sewing time more enjoyable and productive.
Here’s a quick look at some common tools and their uses:
| Tool | Primary Use |
|---|---|
| Sewing Machine | Stitching fabric together |
| Fabric Scissors | Cutting fabric cleanly |
| Measuring Tape | Taking accurate body and fabric measurements |
| Pins | Holding fabric pieces together |
| Seam Ripper | Removing stitches |
| Rotary Cutter | Fast, precise fabric cutting |
| Dress Form | Draping and fitting garments |
| Tailor’s Chalk | Marking fabric |
| Iron | Pressing seams and fabric |
Elevating Your Creations: Professional Details
So, you’ve sewn your garment, and it’s looking pretty good. But how do you take it from ‘homemade’ to ‘professionally made’? It’s all in the little things, the details that make a garment lie flat, look crisp, and just feel right. These aren’t complicated steps, but they really do make a difference.
Mastering Seam Finishes and Clipping
Think about how a store-bought shirt feels. The inside is usually neat, right? That’s because of how the seams are finished. For raw edges inside your garment, you’ve got a few good options. A simple zigzag stitch works well for many fabrics, preventing fraying. For a cleaner look, especially on wovens, you might try pinking shears or a serger if you have one. Clipping curves and corners is also a game-changer. When you cut little notches or triangles into the seam allowance on curves, it lets the fabric bend smoothly. For sharp corners, trimming them diagonally helps them turn out neatly. Paying attention to these seam details is key to a polished finish.
Troubleshooting Common Sewing Issues
Let’s be real, sewing isn’t always perfect. Sometimes seams pucker, or hems look wobbly. Don’t get discouraged! Most common problems have simple fixes. Puckered seams often happen when the tension on your machine is off, or you’re sewing too fast. Try adjusting your tension or slowing down. Uneven hems? Sometimes it’s just about how you’re guiding the fabric. Using a seam guide on your machine or marking your hem carefully with tailor’s chalk can help. It’s worth learning how to fix these little hiccups because they pop up for everyone.
Adding Final Touches for a Polished Look
This is where your garment really shines. Think about topstitching – that visible stitch on the outside of a seam. It not only looks good, adding a clean line, but it also helps the seam lie flat. You can use a contrasting thread for a design element or a matching one for a subtle finish. Pressing is your best friend here. Pressing seams open as you go, and giving the whole garment a good press at the end, makes a huge difference in how professional it looks. Even simple things like making sure buttons are sewn on securely and evenly, or that zippers are installed straight, contribute to that high-quality feel. It’s these small, thoughtful additions that truly transform your sewing project.
Your Style, Your Way
So, there you have it. Making your own clothes might seem like a big undertaking at first, but it’s really about taking it one step at a time. You’ve learned about finding inspiration, making patterns, sewing things together, and even giving old clothes a new life. It’s a journey, for sure, and you’ll get better with practice. Don’t be afraid to experiment and make mistakes – that’s how you learn. Soon enough, you’ll have a wardrobe that’s truly yours, filled with pieces that fit perfectly and show off your unique style. Happy sewing!
Frequently Asked Questions
What’s the first step to designing my own clothes?
Start by finding inspiration! Look at art, nature, old photos, or even current fashion. Think about what colors, shapes, and details you like. This spark will guide you in creating unique garments that show off your personal style.
How do I get a pattern for my custom clothing?
You have a few options! You can change an existing pattern to fit your idea, which is great for beginners. Or, if you want total control, you can draft a pattern from scratch using your own body measurements. It’s like creating a blueprint just for you!
Why should I wash and iron my fabric before sewing?
Washing your fabric first helps prevent it from shrinking or bleeding colors after you’ve made your clothes. Ironing it makes it flat and smooth, so your cuts are straight and your stitches are neat. It’s like prepping your canvas before painting!
Can I really make new clothes from old ones?
Absolutely! Transforming old clothes is a fantastic way to get custom pieces and be eco-friendly. You can turn old jeans into a skirt, a big shirt into a fitted top, or add cool patches and embroidery. It’s all about giving old items a new life and a unique twist.
What are some basic sewing stitches I need to know?
You’ll want to master a few key stitches. The straight stitch is for most seams. The zigzag stitch is great for finishing edges so they don’t fray, and for stretchy fabrics. The backstitch secures your seams at the beginning and end, so they don’t come undone.
How do I make sure my custom clothes fit me perfectly?
Accurate body measurements are super important! Measure yourself carefully for your bust, waist, and hips. Also, understand ‘ease,’ which is the extra room in a pattern for comfort. Small adjustments during sewing can make a huge difference in how your garment looks and feels.