Ever see those clothing photos online where the item looks perfectly shaped, like it’s floating, with no person or mannequin in sight? That’s ghost mannequin photography in action. It’s a really neat trick that makes clothes look great for online stores. It gives products that 3D feel customers need to see how things really fit. We’re going to walk through how to get these shots, from setting things up to editing them, so your products look amazing.
Key Takeaways
- Ghost mannequin photography makes clothes look naturally shaped and floating by removing the physical mannequin or model in editing.
- This technique helps customers visualize the fit and drape of garments better than flat lay images, potentially reducing returns.
- You’ll need multiple shots of each item, including front, back, and interior details, to properly remove the mannequin later.
- Consistent lighting and a clean, neutral background are super important for making the editing process smoother.
- Post-editing in software like Photoshop is where the magic happens, blending shots and removing the mannequin to create the final effect.
Understanding the Ghost Mannequin Effect
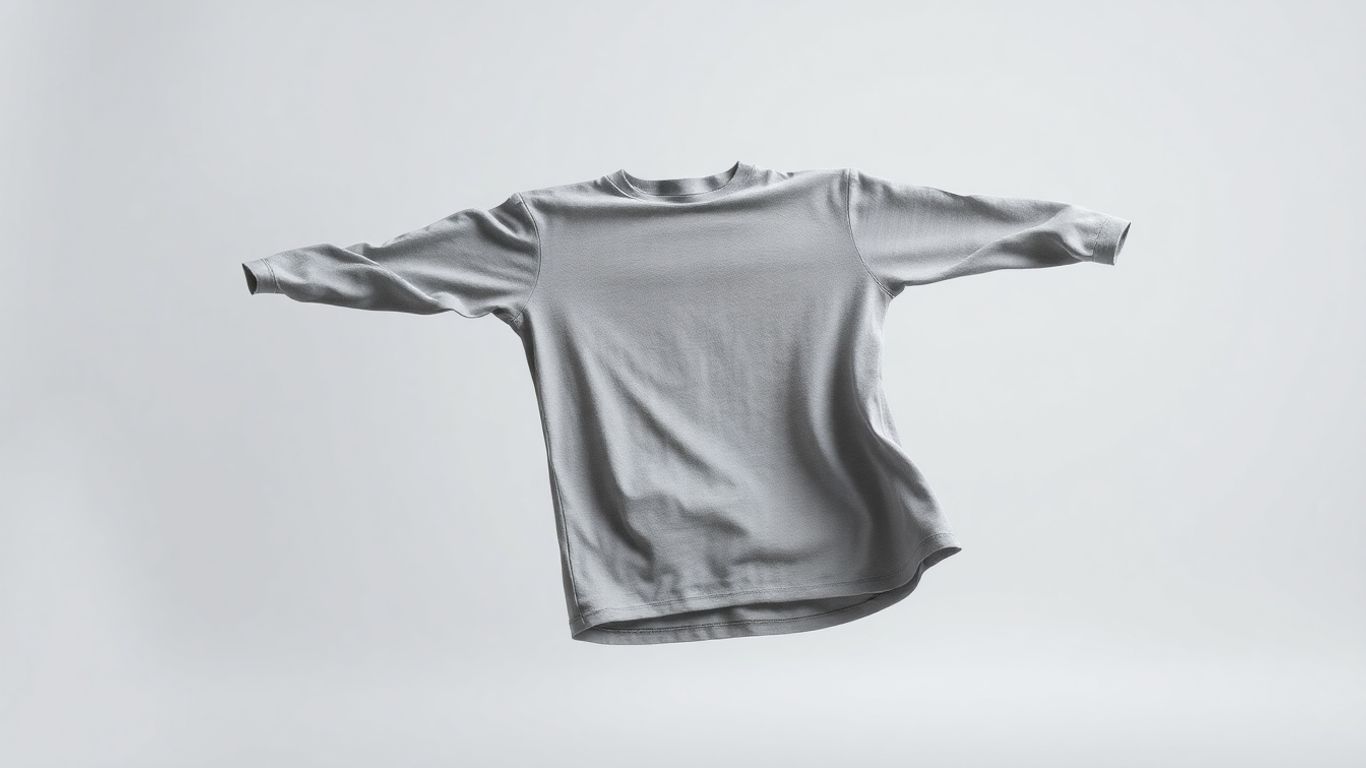
So, what exactly is this "ghost mannequin" thing everyone’s talking about in product photography? Simply put, it’s a technique where you photograph clothing on a mannequin, and then, through some clever editing, you make the mannequin disappear. What’s left is your product looking like it’s floating in mid-air, perfectly shaped and ready to wow potential buyers. It’s like magic, but it’s really just smart photography and editing.
What is Ghost Mannequin Photography?
Ghost mannequin photography, also known as the invisible mannequin effect, is a method used to showcase apparel online. Instead of using a live model or showing the garment flat, you use a mannequin to give the clothing structure and shape. Then, in post-production, the mannequin is removed, leaving just the garment. This creates a clean, professional look that helps customers visualize the fit and form of the item without any distractions.
The Benefits of Invisible Mannequin Shots
Why bother with this technique? Well, there are some pretty good reasons. For starters, it’s often more budget-friendly than hiring models. You get consistent results every time, which is a big plus for branding. Plus, it can actually help reduce returns because customers get a clearer idea of the garment’s fit and shape, leading to fewer surprises when their order arrives. It’s all about giving shoppers a better look at what they’re buying, which can really help boost e-commerce conversions boost e-commerce conversions.
Here are some key advantages:
- Cost-Effective: Cheaper than hiring models for every shoot.
- Consistency: Uniform look across all your product images.
- Clarity: Shows garment shape and fit without human distractions.
- Reduced Returns: Customers have a better understanding of the product.
Key Elements of the Ghost Mannequin Technique
Pulling off the ghost mannequin effect involves a few important steps. You need to capture the garment from multiple angles on the mannequin, and crucially, you also need separate shots of the interior details – like the collar, cuffs, and hems. These interior shots are what you’ll use to patch up the areas where the mannequin used to be, making the final image look seamless and realistic. It’s this combination of exterior and interior shots, expertly blended in editing, that creates the illusion of an invisible form.
The core idea is to present the clothing in a way that highlights its natural drape and structure, making it easy for online shoppers to assess the fit and style. This method avoids the complexities of model casting and scheduling while still providing a dynamic presentation of the apparel.
Essential Equipment for Ghost Mannequin Photography
Alright, so you’ve got the idea of the ghost mannequin effect down, and you’re ready to make some magic happen. But before you start snapping away, let’s talk about what you actually need. Getting the right gear isn’t about having the most expensive stuff; it’s about having the right tools for the job to make your products shine.
Choosing the Right Mannequin
This is your main player, the silent model. Not all mannequins are created equal, especially for this kind of work. You want one that’s going to help you out in the editing room later.
- Detachable Parts: This is a big one. Look for mannequins where you can remove arms, the neck, or even the chest. This makes it way easier to get those shots of the inside collar or sleeves that you’ll need to stitch together later. It saves a ton of editing headaches.
- Neutral Colors: Stick to white or light grey. Anything else can cast a color onto your fabric, and trust me, trying to edit out a blue tint from a white shirt is no fun.
- Realistic Shape: The mannequin should have a shape that generally matches the kind of clothing you’re shooting. For women’s wear, you might want something with curves, while menswear often needs broader shoulders and a straighter torso. A good fit here means the clothes will look more natural.
The mannequin isn’t just a stand; it’s a tool that directly impacts how much work you’ll have to do later. Think of it as your first step in making the editing process smoother.
Camera and Lighting Essentials
Your camera and lights are what capture the image. You can’t edit in detail or sharpness that wasn’t there to begin with. Good lighting and a decent camera are non-negotiable for professional-looking shots.
- Camera: You don’t need the absolute top-of-the-line, but a DSLR or mirrorless camera with at least 20 megapixels is a good starting point. This gives you enough resolution to work with.
- Lenses: A 50mm prime lens is great for a natural perspective, while an 85mm lens is fantastic for getting closer shots without distorting the product’s shape. You want the product to look true to life.
- Tripod: Absolutely vital. A sturdy tripod keeps your camera perfectly still and locked in place. This means every shot you take, from the front to the back of the garment, will be aligned. This consistency is a lifesaver when you’re editing.
- Lighting: Soft, even light is key. Think softboxes or umbrellas set up at a 45-degree angle to the mannequin. You’ll also want a white backdrop to bounce light around and fill in any harsh shadows. Reflectors can also help here.
Essential Studio Setup
Setting up your space correctly from the start makes everything else easier. It’s about creating a controlled environment where you can get consistent results every time.
- Background: A clean white seamless backdrop or a curved
Mastering the Ghost Mannequin Shoot
Alright, so you’ve got your gear ready and your mannequin is looking sharp. Now comes the actual shooting part, and honestly, this is where you lay the groundwork for a killer final image. It’s not just about snapping a few pics; it’s about being strategic. Think of each shot as a puzzle piece that needs to fit perfectly later.
Preparing Your Garments and Studio
Before anything goes on the mannequin, give your garments a good once-over. Lint rollers are your best friend here. Smooth out any wrinkles as much as possible – a steamer can be a lifesaver for trickier fabrics. Make sure tags are tucked away or removed if they’ll be visible in the final shot. Your studio space should be clean, and your background should be consistent. If you’re using a white seamless backdrop, make sure it’s free of scuffs or shadows that will show up later. Consistency is key, especially with lighting. Set your white balance and stick to it for the entire batch of photos. This makes editing so much easier down the line.
Strategic Product Placement on the Mannequin
This is where the magic starts to take shape. You need to dress the mannequin carefully. For shirts, make sure the collar sits nicely and there’s no bunching around the neck. Sleeves often need a little help; you might need to use pins or clips on the inside to make them look full and natural, not deflated. If you’re shooting jackets or hoodies, consider how the interior will look. Sometimes you’ll need to shoot the inside of a hood or the lining separately. The goal is to make the garment look like it’s being worn, even without a person.
Here’s a quick checklist for placement:
- Collar & Neckline: Ensure it lies flat and looks natural. This is often where you’ll stitch in the inside view later.
- Sleeves: Use pins or tape on the inside to give them shape and prevent them from collapsing.
- Buttons & Zippers: Make sure they are aligned correctly and the garment is closed neatly.
- Fit: The garment should look like it fits the mannequin well. Avoid excessive pulling or sagging.
Capturing the Necessary Shots
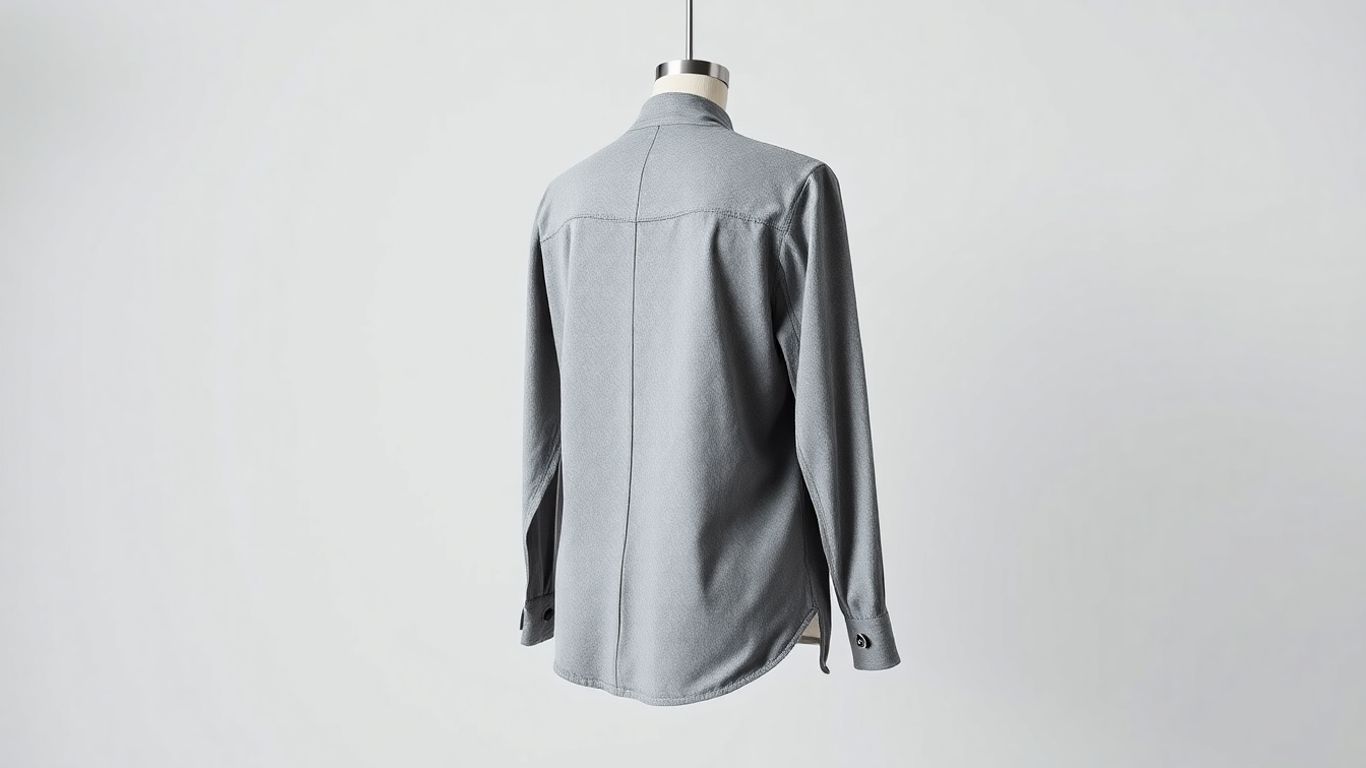
For each garment, you’ll need at least two main shots: the front view on the mannequin and an interior/back view. The interior shot is what you’ll use to fill in the space where the mannequin’s neck and torso were. Sometimes, especially with complex items like jackets with linings or detailed collars, you might need more shots – think close-ups of the inside collar or the back of the neck. Always use a tripod and keep your camera in the exact same position for every shot. This consistency is non-negotiable for smooth editing. You’re essentially building a 3D object from 2D images, so precise alignment is vital. If you’re shooting multiple items, try to batch your work – shoot all the t-shirts one day, then all the sweaters the next. This helps maintain consistent lighting and setup, which really speeds up the editing process. You can find great tips on setting up your studio space for this kind of work.
Remember, the editing process relies heavily on the quality and completeness of the shots you take now. Don’t rush this stage; it’s better to take an extra photo or two than to struggle with gaps or inconsistencies later.
Achieving a Flawless Ghost Mannequin Edit
Alright, so you’ve got your shots, the mannequin is looking good, but now it’s time for the real magic: making that mannequin disappear. This is where your product photos go from ‘okay’ to ‘wow’. It’s all about making the garment look like it’s floating, perfectly shaped, and ready to sell.
Importing and Layering Images in Editing Software
First things first, get your images into your editing program. Photoshop is the go-to for most folks, but GIMP or Affinity Photo work too. You’ll want to open your main shot (the one with the mannequin) and the shot you took of the inside of the garment (like the collar or neckline) as separate layers. Think of it like stacking transparencies. The key here is alignment. Make sure those layers line up perfectly. If your camera didn’t move between shots and you used a tripod, this should be pretty straightforward. If not, you might need to do a bit of manual nudging to get everything centered. This step is super important because if your layers are off, your final image will look wonky, and nobody wants that.
Removing the Mannequin While Preserving Shape
Now for the part where the mannequin vanishes. You’ll use selection tools – like the Pen Tool or Lasso Tool – to carefully trace around the garment on your main shot. Once you’ve got the garment selected, you’ll cut it out or mask it. The goal is to isolate the clothing itself. Then, you’ll take that second shot you took of the inside of the garment (the collar, the neckline, etc.) and paste it into the ‘hole’ left by the mannequin. You’ll need to position this piece so it looks like a natural continuation of the garment. Sometimes, you might need to take a shot of the back of the garment too, especially if there’s a zipper or a specific seam you want to show. It’s all about filling in those gaps so the garment looks complete and has a nice, clean edge where the mannequin used to be.
Blending Interior Details for a Realistic Look
This is where you really make it look professional. After you’ve got the main garment and the interior pieces layered, you’ll need to blend them. Pay close attention to the edges where you’ve joined the pieces. You might need to use tools like the Clone Stamp or Healing Brush to smooth out any rough transitions. Also, think about shadows. Even though the mannequin is gone, the garment still has shape and dimension. You can add subtle shadows and highlights to give the clothing a bit of depth, making it look less flat. Adjusting the brightness and contrast of the interior pieces so they match the lighting of the main garment is also a good idea. You want it to look like one continuous piece of clothing, not something pieced together. A little bit of retouching to clean up any stray lint or dust will also go a long way.
Overcoming Common Ghost Mannequin Challenges
Even with the best intentions, ghost mannequin photography can throw a few curveballs your way. Don’t let these common issues stop you from getting those killer product shots. We’ll walk through how to tackle them.
Ensuring the Perfect Garment Fit
Getting the clothes to look just right on the mannequin is a big deal. If a shirt is too tight, it’ll look stretched, and if it’s too loose, it’ll just hang there looking sloppy. This can really mess with how a customer sees the actual fit of the garment. It’s all about making the clothing look natural, like someone’s actually wearing it.
- Use mannequins with adjustable parts: Mannequins that let you swap out neck pieces or arms can help you get a better drape. Think about getting one with different torso sizes if you shoot a lot of varied clothing.
- Keep pins, clips, and tape handy: These are your best friends for making minor adjustments. You can cinch in a waist, smooth out a wrinkle, or make sure a hemline is perfectly straight. Just be careful not to make them too obvious in your shots.
- Consider garment size: Always try to use a mannequin that’s close to the size of the garment you’re shooting. A tiny shirt on a huge mannequin, or vice-versa, is going to be a nightmare to make look good.
Managing Reflective Materials
Shiny fabrics, like satin or certain synthetics, can be tricky. They tend to pick up dark reflections from the studio, making the fabric look dull or even black instead of its true color and sheen. This is where lighting really matters.
- Soften your light: Use large light sources, like softboxes or umbrellas, and position them relatively close to the mannequin. This wraps the light around the product, reducing harsh reflections.
- Bounce light: Use white cards or reflectors to bounce light back into the darker areas of the garment. This fills in shadows and brings out the material’s natural shine. You want the light to be even across the surface.
- Experiment with angles: Sometimes, just slightly changing the angle of your lights or the mannequin can make a big difference in how reflections appear. It’s about finding that sweet spot where the material looks its best.
Maintaining Consistent Lighting Across Shots
Consistency is key, especially when you’re shooting multiple items for a collection. If the lighting changes from one product to the next, your whole catalog will look a bit messy. This is especially true when dealing with uneven lighting that can cast weird shadows.
- Set up your lights and leave them: Once you have your lighting dialed in for one shot, mark the positions of your lights, camera, and backdrop. This way, you can easily replicate the setup for every subsequent product.
- Use a tethered setup: Shooting with your camera connected to a computer allows you to see your shots immediately. This makes it easier to spot any lighting inconsistencies before you move on.
- Shoot in a controlled environment: Try to shoot all your products in the same session, in the same location, to minimize environmental factors that could affect lighting, like changing daylight.
Dealing with tricky fabrics or getting that perfect fit might seem like a hassle, but it’s really about paying attention to the details. Small adjustments and smart lighting choices can make a huge difference in the final look of your product photos. It’s these little things that help customers feel more confident about what they’re buying online.
Pro Tips for Stunning Ghost Mannequin Results
Alright, so you’ve got the basics down, and your shots are looking pretty good. But how do you take them from ‘good’ to ‘wow’? It’s all about those little extras, the details that make your product photos pop. Think of it like adding the perfect seasoning to a dish – it just makes everything better.
Adding Subtle Shadows and Highlights
This is where you give your garment that extra bit of life. After you’ve removed the mannequin, the fabric can sometimes look a bit flat. To fix this, grab your editing software and a soft brush. You want to paint in subtle shadows and highlights that mimic how light would naturally fall on the fabric. Don’t go crazy here; it’s about adding depth, not creating a dramatic spotlight. Think about where the folds are, where the seams are, and where light might naturally catch or recede. This makes the clothing look more three-dimensional and appealing. It’s a bit like sculpting the image to give it form.
Maintaining Consistency in Your Workflow
If you’re shooting multiple items, keeping things consistent is super important. This means using the same lighting setup, the same camera angles, and the same editing process for every single piece. If one shirt looks bright and airy and the next is dark and moody, it can be jarring for shoppers. A consistent look across your product catalog builds trust and makes your brand look more professional. It also makes it way easier for you to edit everything quickly once you get into a rhythm. Think about creating a checklist for your setup and editing steps.
Here’s a quick rundown of what to keep consistent:
- Lighting: Use the same softboxes and reflectors for every shot.
- Camera Settings: Keep your aperture, shutter speed, and ISO the same.
- Background: Always use a clean, white backdrop.
- Editing Steps: Follow the same layer order and adjustment techniques.
Leveraging Detail Shots for Added Realism
Sometimes, the main shot just doesn’t show off everything. That’s where detail shots come in. Think about close-ups of interesting textures, unique buttons, intricate stitching, or a cool collar design. These extra images give potential buyers a closer look and can highlight the quality of your product. They also help fill out your product page and give customers more information to make a decision. You can even use these detail shots to help mask any tricky areas during the editing process, like a complex neckline. Remember, high-quality images from multiple angles can really help boost engagement and conversions.
When you’re editing, pay close attention to the edges where the mannequin was removed. Sometimes, little bits can be left behind, or the fabric might look a bit too sharp or unnatural. Using tools like the clone stamp or healing brush can help blend these areas smoothly. It’s these small refinements that make a big difference in the final look of your product photos.
Wrapping It Up
So, there you have it. Ghost mannequin photography might seem like a lot of work at first, with all the shooting and editing. But honestly, once you get the hang of it, it really makes your products pop online. It gives customers a much better idea of how clothes will actually look on them, which is super important when they can’t try anything on in person. Plus, it just looks really professional. Stick with these tips, practice a bit, and you’ll be creating those clean, eye-catching shots that get people clicking ‘add to cart’ in no time. Happy shooting!
Frequently Asked Questions
What exactly is ghost mannequin photography?
It’s a cool photo trick where you shoot clothes on a mannequin, then use editing software like Photoshop to take the mannequin out. This makes the clothes look like they’re floating or being worn by an invisible person, showing off the shape and fit perfectly.
Why should I use the ghost mannequin style instead of just flat photos?
Flat photos can sometimes look boring and don’t show how clothes really hang. Ghost mannequin shots give your products a 3D look, helping customers imagine how the item will actually fit and look on them, which can lead to more sales.
What basic gear do I need to get started?
You’ll need a mannequin (some have removable parts which helps!), a decent camera (even a good smartphone camera can work), and good lighting. A clean, plain background, like a white sheet or wall, is also super important.
How many photos do I need to take for each item?
Usually, you’ll need at least three or four shots for each piece of clothing. This includes a front view, a back view, and often a shot of the inside of the collar or neckline. Sometimes you’ll need extra shots of the garment laid flat on a white board to help fill in gaps later.
What’s the hardest part of ghost mannequin photography?
Getting the clothes to fit just right on the mannequin is key. Also, dealing with shiny or reflective materials can be tricky because they can create weird reflections. Making sure the lighting is the same for every single shot you take is also a big one.
Can I make my ghost mannequin photos look even better?
Yes! Adding soft shadows and highlights can make the clothes look more real and give them more depth. Always try to keep your process the same for every item, and don’t forget to take close-up shots of cool details like buttons or fabric texture.