Setting up payment methods in WooCommerce is essential for any online store. If you want your customers to complete their purchases smoothly, you need to know how to add payment methods in WooCommerce. This guide will walk you through the steps to enable various payment options, ensuring you pick the right ones for your business and customers. Let’s get started!
Key Takeaways
- Understand the types of payment methods available in WooCommerce.
- Choose a payment gateway that fits your business needs and customer preferences.
- Activate and reorder payment methods easily through the WooCommerce settings.
- Configure popular payment gateways like PayPal and credit card processors with simple steps.
- Regularly test your payment setup to ensure everything works smoothly for your customers.
Understanding Payment Methods in WooCommerce
Before you even think about selling anything, you’ve gotta figure out how you’re going to get paid. WooCommerce gives you a bunch of options, but it can be a little overwhelming at first. Let’s break down the basics so you can make the right choices for your store.
Types of Payment Methods
WooCommerce isn’t just about credit cards. You’ve got a whole range of choices. There are the usual suspects like credit and debit cards, which are pretty much a must-have. Then you’ve got digital wallets like PayPal, which a lot of people prefer for the extra security. And don’t forget about bank transfers, which can be good for larger transactions, even though they take a bit longer. You can even set up cash on delivery if you’re doing local stuff. Plus, there’s a growing number of payment gateway plugins that let you add even more options, like specific regional payment methods or buy-now-pay-later services. It’s all about giving your customers what they want.
Choosing the Right Payment Gateway
Okay, so you know the types of payments, but how do you actually process them? That’s where payment gateways come in. Think of them as the middleman between your store and your bank. They handle all the sensitive info and make sure the money gets where it needs to go. Choosing the right one is super important. Some popular ones include PayPal, Stripe, and Authorize.net, but there are tons of others. Each one has its own fees, security features, and compatibility with WooCommerce, so do your homework. You’ll want to look at things like transaction fees, monthly costs, and whether they support the types of payments your customers want to use. E-commerce payment gateway integration payment gateway integration is key for secure online sales.
Factors to Consider When Selecting Payment Options
Choosing payment methods isn’t just about what’s easiest for you. You’ve got to think about your customers, too. Here’s a few things to keep in mind:
- Fees: Every payment method comes with fees. Some are a flat rate per transaction, others are a percentage, and some have both. Make sure you understand the fee structure before you commit.
- Security: This is huge. You need to make sure your customers’ payment information is safe. Look for payment gateways that are PCI compliant and have strong security measures in place.
- Customer Preference: What payment methods do your customers actually use? If you’re selling to a specific region, there might be a popular local payment method you need to support.
- Integration: How well does the payment gateway integrate with WooCommerce? You want something that’s easy to set up and use, and that doesn’t cause any conflicts with your other plugins.
Picking the right payment methods can seriously impact your sales. If you make it hard for people to pay, they’re just going to go somewhere else. So, take the time to research your options and choose the ones that are the best fit for your business and your customers.
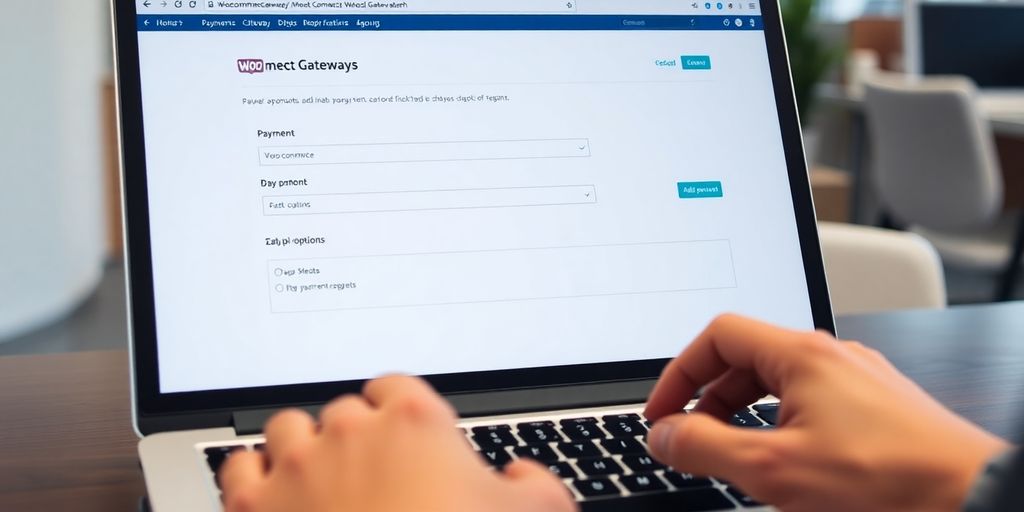
Navigating to Payment Settings
Alright, so you’re ready to set up how you’ll get paid. That’s great! Let’s walk through how to find the payment settings in WooCommerce. It’s actually pretty straightforward.
Accessing WooCommerce Settings
First things first, you need to get into the backend of your WordPress site. Once you’re logged in, look for the WooCommerce option in the left-hand menu. Hover over it, and a submenu will pop up. You’ll see a bunch of options, but the one we want is "Settings". Click on that, and you’re on your way. It’s like finding the control panel for your entire online store. From here, you can tweak just about anything related to your shop, from products to shipping to, you guessed it, payments. This is where the magic happens, so to speak. It’s important to prevent disputes by setting up your payment options correctly.
Finding the Payments Tab
Once you’re in the WooCommerce settings, you’ll see a row of tabs across the top of the page. These tabs organize all the different settings into logical sections. You’ll see tabs like "General", "Products", "Shipping", and so on. The one we’re interested in is labeled "Payments". Click on the "Payments" tab to access all the payment-related settings. It’s usually near the end of the row, but the exact order might depend on any extra plugins you have installed. This tab is your gateway to configuring how customers will pay you, so it’s a pretty important place to be familiar with.
Understanding Payment Method Options
Okay, you’ve made it to the Payments tab. Now what? Well, here you’ll see a list of all the available payment methods that WooCommerce supports, or that have been added via plugins. You’ll probably see options like PayPal, direct bank transfer, credit card processing (usually via a plugin like Stripe), and maybe even some more niche options depending on what you’ve installed. Each payment method will have its own settings that you can configure. This is where you decide which payment methods you want to offer your customers. It’s a good idea to offer a few different options to cater to different preferences.
Think of it like this: offering multiple payment options is like having different checkout lanes at a grocery store. The more options you provide, the smoother and faster the checkout process will be for your customers, and the happier they’ll be. And happy customers are repeat customers!
Here’s a quick rundown of some common payment options:
- PayPal: A widely used online payment system.
- Stripe: A popular platform for processing credit and debit card payments.
- Direct Bank Transfer: Allows customers to pay directly from their bank account.
- Cash on Delivery: (If applicable) Allows customers to pay when they receive their order.
Enabling Payment Methods
Okay, so you’ve found the payment settings in WooCommerce. Now comes the fun part: actually turning on the payment methods you want to use. It’s not too tricky, but there are a few things to keep in mind.
Selecting Payment Gateways
First things first, you need to decide which payment gateways you want to offer your customers. WooCommerce comes with a few built-in options like PayPal Standard and direct bank transfer (BACS). These are okay for getting started, but you might want to consider other options, especially if you want to accept credit cards directly on your site. There are tons of payment gateway plugins available, each with its own fees and features. Think about what’s important to you – transaction fees, security, ease of use – and do a little research to find the best fit.
Activating Payment Options
Once you’ve picked your gateways, it’s time to activate them. Head back to the WooCommerce payment settings, and you’ll see a list of available payment methods. Simply toggle the switch next to each one you want to enable. Keep in mind that some gateways might require you to enter some additional information, like your API keys or account details. WooCommerce will usually redirect you to the payment method’s setup screen if it needs more info.
Reordering Payment Methods
Did you know you can change the order in which payment methods are displayed at checkout? It’s true! It’s a small thing, but it can make a difference in the customer experience. Maybe you want to highlight the option with the lowest fees for you, or perhaps you want to put the most popular option at the top. Whatever your reason, it’s easy to do. Just drag and drop the payment methods in the order you want them to appear.
It’s a good idea to think about your target audience when choosing and ordering payment methods. What are they most comfortable using? What are they most likely to trust? Offering a variety of options can help you cater to a wider range of customers and increase your sales.
Here’s a quick rundown of some common payment methods:
- Direct Bank Transfer (BACS): Customers make a payment directly from their bank account. You’ll need to provide your bank details.
- Check Payments: Customers send you a check. You’ll need to provide your mailing address.
- Cash on Delivery (COD): Customers pay when they receive their order. This is best if you deliver the order in person.
And here’s a table showing the basic steps:
| Step | Action |
|---|---|
| 1 | Go to WooCommerce > Settings > Payments |
| 2 | Enable desired payment methods |
| 3 | Configure settings for each method |
| 4 | Drag and drop to reorder payment methods |
| 5 | Save changes |
Configuring Payment Gateways
Alright, so you’ve enabled some payment methods in WooCommerce. Now comes the part where you actually make them work. This is where you configure each gateway to properly process transactions. It might seem a little daunting at first, but I promise it’s manageable. Let’s break it down.
Setting Up PayPal
PayPal is a pretty common choice, and setting it up is usually straightforward. You’ll need a PayPal Business account to start.
Here’s the gist:
- Go to your WooCommerce settings, then the Payments tab.
- Find PayPal in the list and click "Manage" or "Set up."
- Enter your PayPal email address (the one associated with your Business account).
- You might need to enable IPN settings (Instant Payment Notification) in your PayPal account. This lets PayPal tell your store when a payment is received.
- Save your changes.
PayPal also offers options for customizing the payment experience, like choosing the PayPal page style and enabling auto-return. Take a look at those settings to tailor it to your brand.
Integrating Credit Card Processors
Accepting credit cards directly on your site usually involves a payment gateway like Stripe or Authorize.net. These services handle the secure processing of credit card info. The setup varies a bit depending on the gateway, but here’s the general idea:
- Install the plugin for your chosen gateway (e.g., the official Stripe plugin).
- Activate the plugin.
- Go to the WooCommerce Payments settings and find the gateway.
- You’ll need to enter API keys. These are unique codes that connect your store to the payment gateway’s servers. You’ll get these from your gateway account.
- Configure settings like accepted card types, statement descriptors, and whether to enable 3D Secure for extra security.
Using Third-Party Payment Plugins
WooCommerce has a ton of third-party payment plugins that can connect you to all sorts of payment options. These plugins often handle niche payment methods or offer integrations with specific services. For example, you might find plugins for accepting payments via cryptocurrency, or for integrating with local payment processors in different countries.
When using these plugins:
- Make sure the plugin is reputable and well-reviewed. Check the developer’s website and read user reviews to make sure it’s reliable.
- Follow the plugin’s specific instructions for setup. Each plugin will have its own configuration process.
- Keep the plugin updated. Outdated plugins can have security vulnerabilities.
Configuring payment gateways can take some time, but it’s worth it to offer your customers a variety of payment options and a smooth checkout experience.
Testing Your Payment Setup
Okay, so you’ve set up your payment gateways in WooCommerce. Awesome! But before you start selling, you absolutely need to make sure everything is working correctly. Nothing is worse than losing a sale because of a payment error. Trust me, I’ve been there.
Conducting Test Transactions
The best way to test your setup is by making test transactions. Most payment gateways, like PayPal and Stripe, offer a "test mode" or "sandbox" environment. This lets you simulate real purchases without actually charging your card. Look for the option to enable test mode in your payment gateway settings. For example, with WooCommerce payment methods, you can enable test mode to simulate transactions. Use the test credit card numbers provided by the gateway to complete the purchase.
Verifying Payment Processing
After you’ve made a test transaction, don’t just assume it went through. You need to verify that the payment was actually processed correctly. Here’s what to check:
- WooCommerce Order: Go to your WooCommerce Orders page and find the test order. Make sure the status is "Processing" or "Completed," depending on how you configured your gateway.
- Payment Gateway Dashboard: Log in to your payment gateway account (e.g., PayPal, Stripe) and look for the test transaction in your transaction history. Verify that the amount, date, and status are correct.
- Email Notifications: Check your email (the one associated with your WooCommerce store) for order confirmation emails. Also, check the customer’s email (if you used a real email address for the test) to ensure they received an order confirmation as well.
Troubleshooting Common Issues
Even with careful setup, things can sometimes go wrong. Here are a few common issues and how to troubleshoot them:
- Payment Declined: If your test payment is declined, double-check that you’re using the correct test card numbers and that the card hasn’t expired. Also, make sure you’ve entered all the required information correctly (e.g., billing address, CVV code).
- Order Status Stuck: If the order status is stuck on "Pending Payment," there might be a problem with the payment gateway’s callback URL. This URL tells WooCommerce when a payment has been completed. Check your payment gateway settings to ensure the callback URL is configured correctly.
- No Email Notifications: If you’re not receiving email notifications, check your WooCommerce email settings to make sure the emails are enabled and that the email address is correct. Also, check your spam folder, just in case.
Testing your payment setup might seem like a hassle, but it’s a crucial step in ensuring a smooth and reliable checkout experience for your customers. Take the time to do it right, and you’ll save yourself a lot of headaches down the road.
Managing Payment Transactions
Once you’ve got your payment methods set up, it’s time to understand how to manage the transactions that come through your WooCommerce store. This involves everything from checking past sales to handling refunds and keeping your payment settings up-to-date. It’s not always the most exciting part, but it’s essential for keeping your business running smoothly.
Viewing Transaction History
Keeping an eye on your transaction history is super important. It lets you see all the payments that have been processed through your store. You can usually find this in the WooCommerce settings, often under the "Orders" section. From there, you can filter by date, payment method, or order status to get a clear picture of your sales. Regularly reviewing this history helps you spot any unusual activity or discrepancies.
Here’s what you might typically see in your transaction history:
- Order Date and Time
- Customer Name
- Order Total
- Payment Method Used
- Transaction Status (e.g., Completed, Pending, Refunded)
Handling Refunds and Disputes
Inevitably, you’ll need to deal with refunds and disputes. When a customer requests a refund, you’ll need to process it through WooCommerce and your payment gateway. Make sure you understand the refund policies of each payment method you use, as they can vary. Disputes, on the other hand, are more complex. These usually involve a customer contacting their bank or credit card company to challenge a charge. You’ll need to respond to these disputes promptly and provide any necessary documentation to support your case. A new order can be created to process payments.
Updating Payment Method Settings
Payment processing isn’t a "set it and forget it" kind of thing. You’ll need to periodically update your payment method settings to keep everything running smoothly. This might involve updating your API keys, changing your payout schedule, or adding new payment options. It’s also a good idea to review your settings regularly to make sure they still align with your business needs.
Keeping your payment method settings up-to-date is crucial for security and compliance. Payment gateways often release updates to address security vulnerabilities or comply with new regulations. Failing to update your settings could leave your store vulnerable to fraud or other issues.
Staying Updated with Payment Solutions

Payment solutions are always changing, so it’s important to stay informed. New technologies emerge, customer preferences shift, and security threats evolve. Keeping up with these changes helps you provide the best possible experience for your customers and protect your business.
Keeping WooCommerce Updated
Regular updates are important for WooCommerce. These updates often include improvements to payment processing, security patches, and compatibility with the latest payment gateways. It’s a good idea to set up automatic updates or schedule regular checks to ensure you’re always running the most current version. This helps avoid bugs and security issues that could disrupt your store! Also, make sure you stay on the latest version of WooCommerce and WooPayments.
Monitoring Payment Gateway Changes
Payment gateways also undergo changes. These changes can include new features, updated security protocols, and adjustments to fees. Subscribe to newsletters or follow the blogs of your chosen payment gateways to stay informed about these updates. Understanding these changes allows you to adapt your payment setup and take advantage of new opportunities. For example, you might find that integrating WooCommerce PayPal Payments can enhance conversions.
Exploring New Payment Features
Don’t be afraid to explore new payment features and technologies. Cryptocurrencies, mobile payments, and buy now, pay later options are becoming increasingly popular. Consider adding these options to your store to cater to a wider range of customers and stay ahead of the competition.
Staying informed about payment solutions is an ongoing process. By keeping WooCommerce updated, monitoring payment gateway changes, and exploring new features, you can ensure your store offers a secure, convenient, and up-to-date payment experience for your customers.
Wrapping It Up
So there you have it! Adding a payment method in WooCommerce isn’t as tough as it might seem. Just follow the steps we laid out, and you’ll be ready to accept payments in no time. Remember to think about what works best for your customers and your business. Take your time with the setup, and don’t hesitate to check out the documentation for any payment gateway you choose. With the right payment options in place, you’ll be all set to start selling and making those sales happen!
Frequently Asked Questions
What types of payment methods can I use with WooCommerce?
WooCommerce supports various payment methods, including credit cards, PayPal, bank transfers, and cash on delivery.
How do I choose the best payment gateway for my store?
When selecting a payment gateway, consider factors like fees, customer preferences, security, and the types of payments you want to accept.
Can I enable multiple payment options?
Yes, you can enable multiple payment options in WooCommerce. This allows customers to choose their preferred method at checkout.
How do I set up PayPal in WooCommerce?
To set up PayPal, go to WooCommerce > Settings > Payments, then enable PayPal and follow the setup instructions provided.
What should I do if a payment fails?
If a payment fails, check your internet connection, verify the payment details, and ensure that your payment gateway is working properly.
How can I test my payment methods before going live?
You can conduct test transactions in WooCommerce by enabling a sandbox mode in your payment gateway settings.